
DellEMC Isilon Simulator - Part 1
Introduction
We use DellEMC Isilon as our primary NAS solution which is not a product I have used before. I wanted to learn more about it but not willing to mess with the ones at work.
Luckily DellEMC provide a free Isilon simulator in OVA format suitable for importing into VMware Workstation, Fusion, or ESXi. In this and the next post I will cover setting up a cluster ready to enable file services.
This procedure was performed on VMware Workstation 15 and Isilon OVA version 8.1.2 dated 8/13/2018.
Prep
My lab runs entirely nested on VMware Workstation. I have a pfSense router with two NICs, WAN connected as a NAT interface and the LAN interface second NIC in a LAN segment. I will be placing the Isilon Cluster in the LAN segment and use the domain in the lab.
I will have four nodes in the cluster so four IP addresses are required. I will first add four entries for the nodes into DHCP but use the same name for each record. I can do this in PowerShell easily:
Add-DnsServerResourceRecordA -IPv4Address 10.10.1.91 -Name isilon -ZoneName corp.contoso.com -CreatePtr
Add-DnsServerResourceRecordA -IPv4Address 10.10.1.92 -Name isilon -ZoneName corp.contoso.com -CreatePtr
Add-DnsServerResourceRecordA -IPv4Address 10.10.1.93 -Name isilon -ZoneName corp.contoso.com -CreatePtr
Add-DnsServerResourceRecordA -IPv4Address 10.10.1.94 -Name isilon -ZoneName corp.contoso.com -CreatePtr
We are now ready to deploy the first node. You can download the OVA from DellEMC here (no registration required!)
Setup Node 1 - OVA Deployment
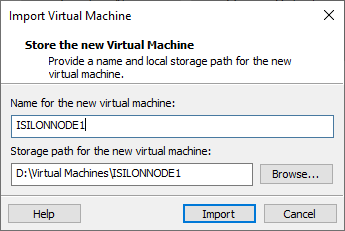
In Workstation go to File…Open… and open the downloaded OVA. The only thing required to do here is name the VM:
There are three interfaces on each node VM - int-a, int-b and failover and so three NICs in the VM properties. I just set all three vNICs to my isolated LAN Segment as it’s nested so there are no multiple physical networks and makes it available in the nested lab. Also as a side note the OVA is supplied as a Workstation 8.x hardware version. I have had no issues upgrading with to the latest v15.x version.
Setup Node 1 - Internal Interfaces
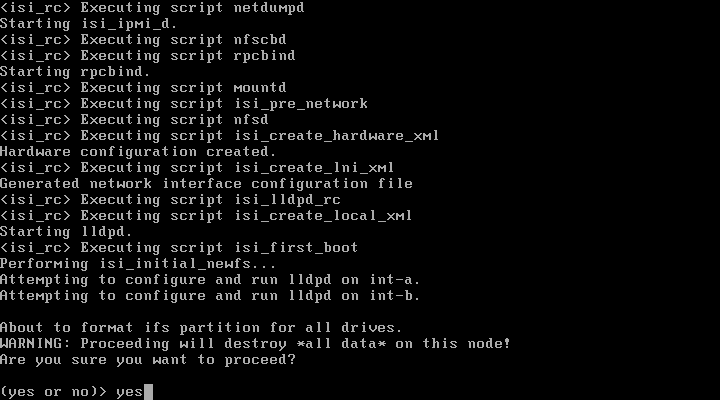
I then power on the VM. The VM starts up and will initially ask you if you want to format the ifs partition for all the disks. Type yes to proceed:
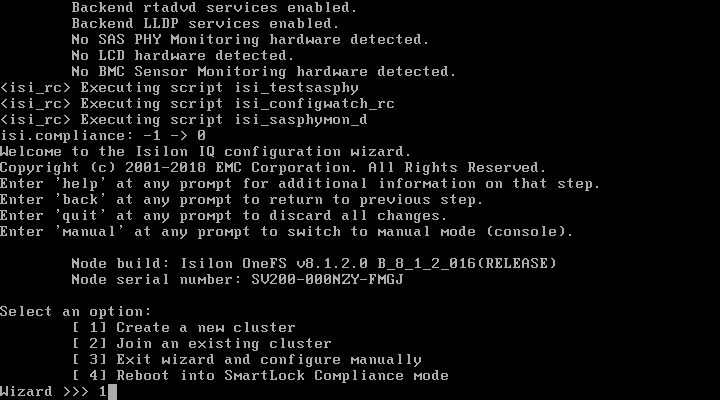
The disks will format and you will get to setup wizard. The first thing is to select option 1 to Create a new cluster. Press 1 to continue:
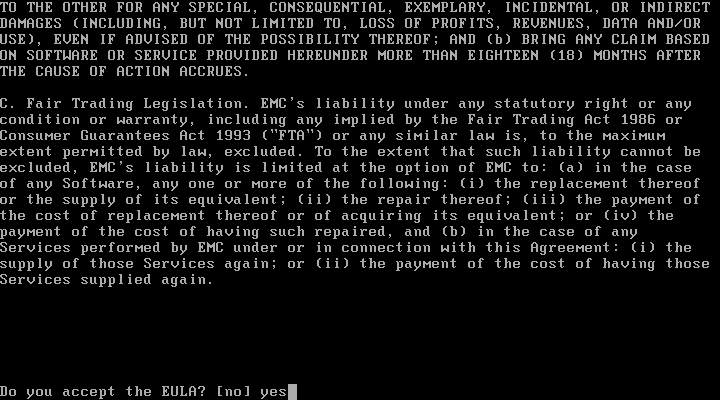
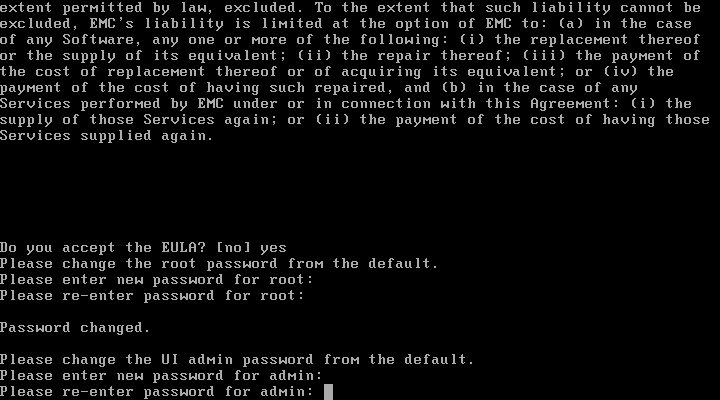
The Software License and Maintenance Agreement appears. Press Spacebar to scroll through and type yes to agree:
You will next be asked to supply root and UI admin passwords. Enter both and confirm. It’s a lab so I just set both the same which is allowed:
Next we need to name the cluster. I choose a simple name of ISILON:
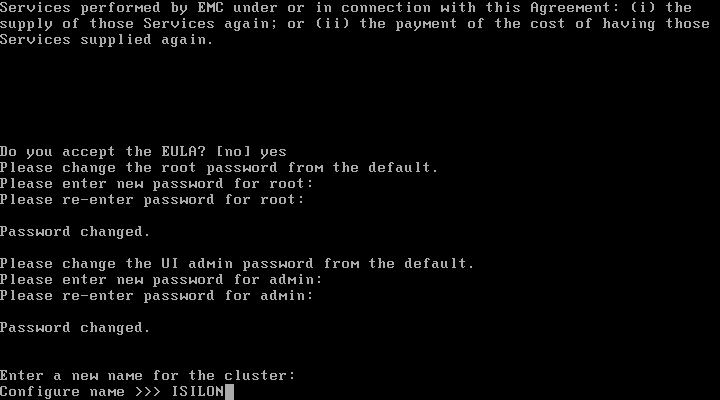
Note note is the cluster name should be 11 characters or less otherwise you will get a warning regarding Netbios.
Next is encoding format. I leave the default of UTF-8 so press Enter:

we now have choices for networking. There are four networks in an Isilon cluster - int-a, int-b, failover and external. Networks int-a, int-b, and Failover are used for inter node communication. external is used for access to file services and management. The only one required is int-a and you can use that for all node communication and file services which is feasible in a lab, but I am going for the following:
int-a- 192.168.1.x/24int-b- 192.168.2.x/24external- 10.10.1.x/24
The wizard first asks to configure int-a. Press 1 to configure the netmask and enter it:
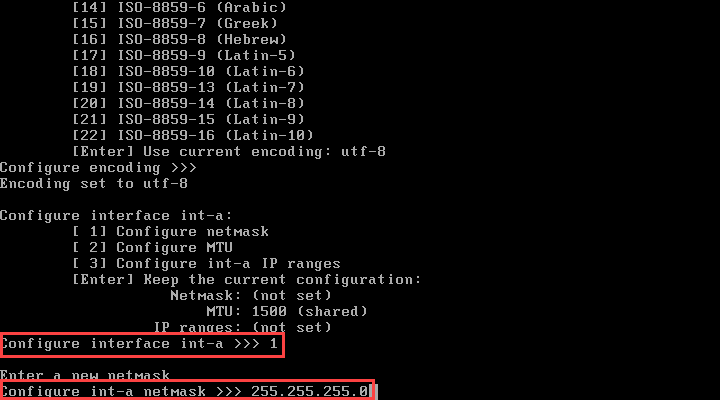
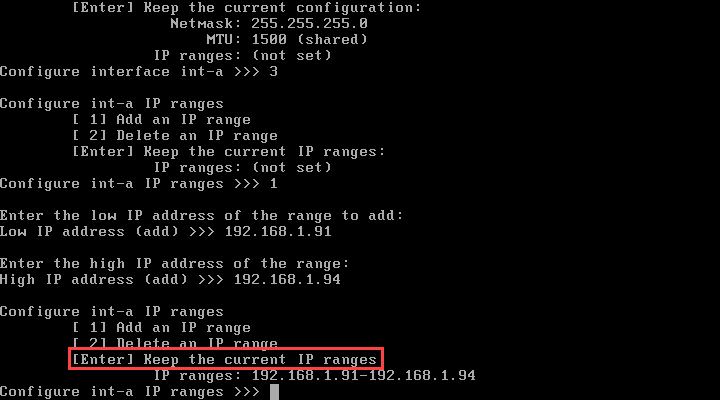
I will not chance the MTU so I will press 3 to configure and IP range. I then need to press 1 to add and IP range. The wizard asks you to enter and IP range to cover all the nodes that will be in the cluster. I an having four nodes, so for int-a the IP range will be 192.168.1.91 - 192.168.1.94 (low to high):
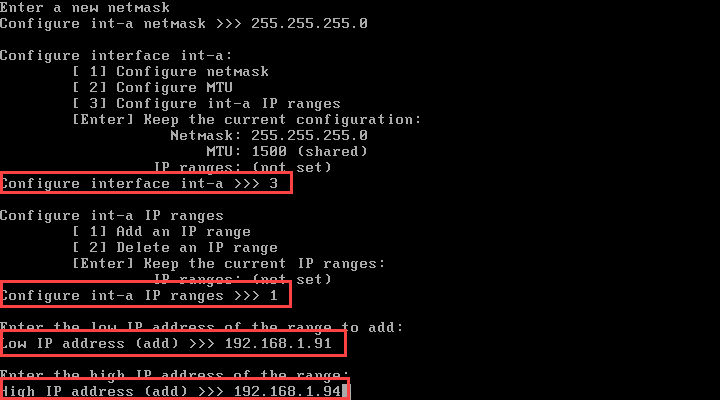
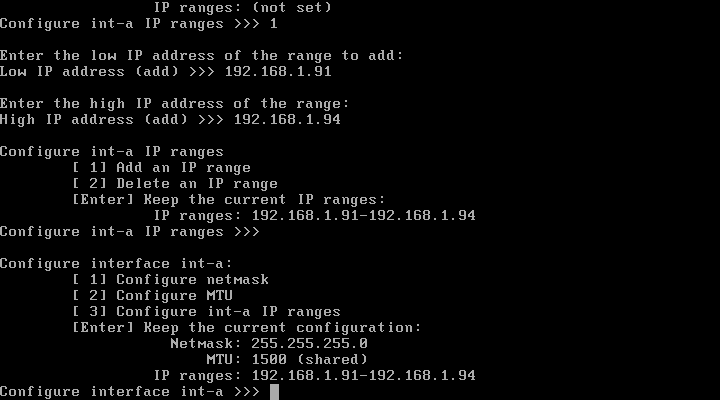
Once the IP range is set press Enter to confirm the IP range configuration of int-a:
Press Enter to select Keep the current configuration:
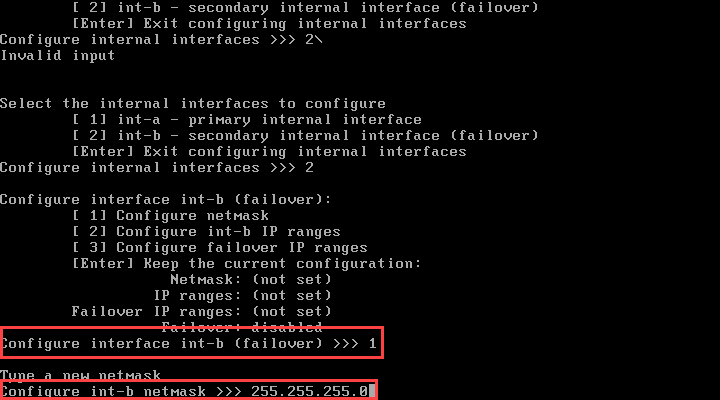
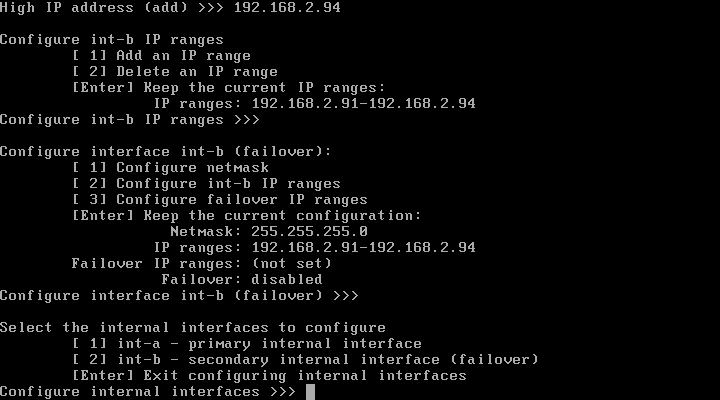
We can now configure int-b interface. Type 2 to enter the configuration:

It is the same sequence of steps as above. Select 1 to set the Netmask (255.255.255.0) and then then 2 to set the IP Range of the interface int-b:
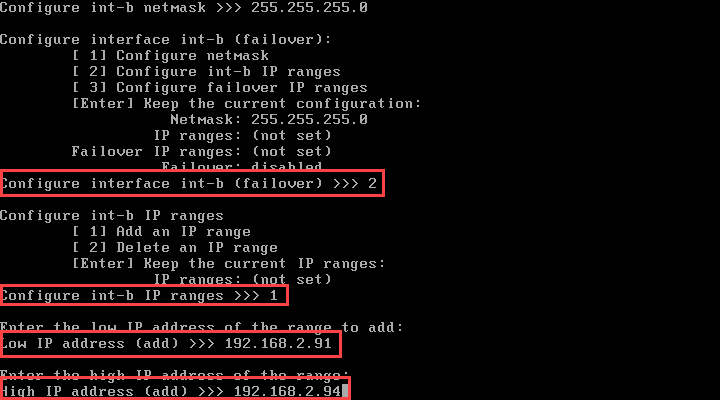
I will not bother configuring the failover interface. So but completing the int-b configuration and getting back to the internal interfaces screen I press Enter to complete the configuration:
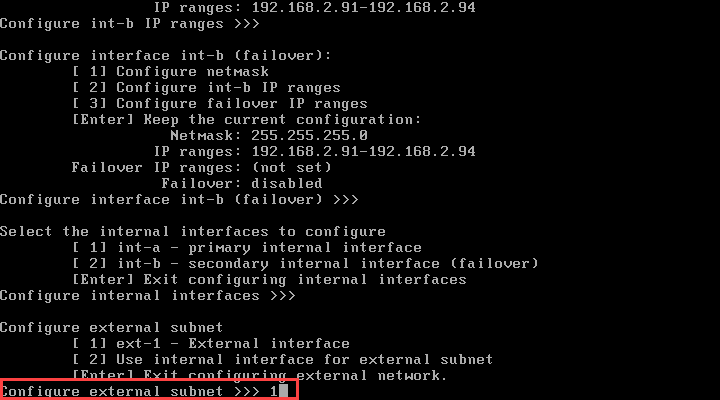
Setup Node 1 - External Interface
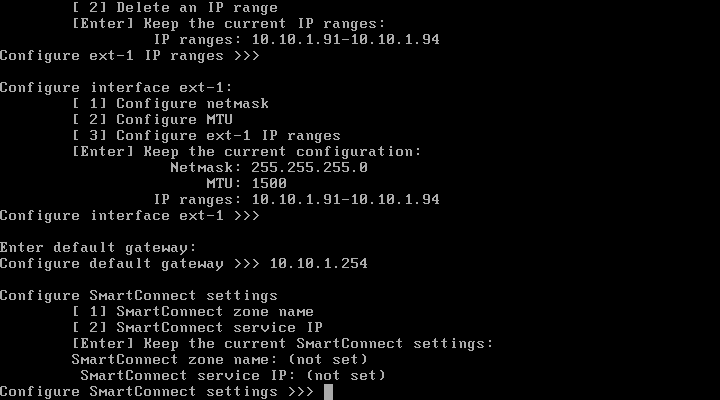
So now the internal inter node networks are setup I need to configure the external network. As I said above this network is for file services and management access. If I had set the internal networks to 10.10.1.x IP range I could select option 2 in the wizard, but in this case I select option 1 to configure the ext-1 network:
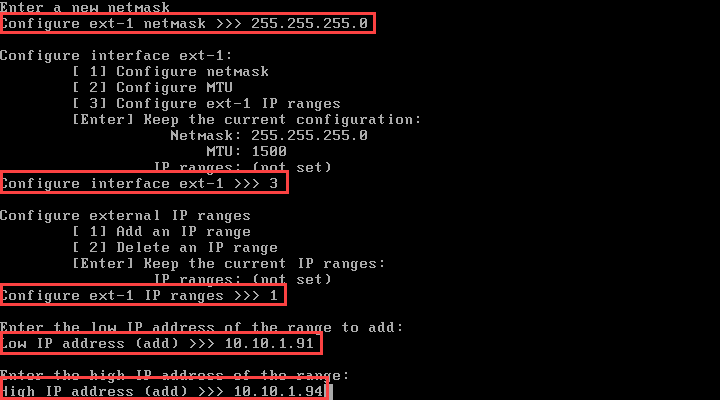
The wizard process is the same as we have completed above. Select 1 to configure the Netmask, then 3 to set the ext-1 IP range using the range 10.10.1.91 - 10.10.1.94. This is the range of IPs I created DNS entries for in AD:
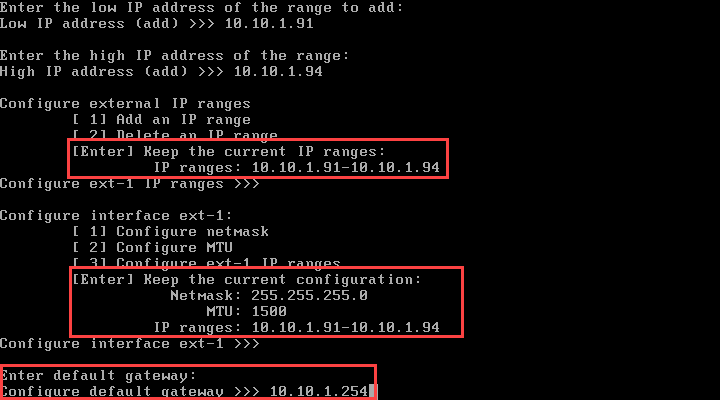
Press Enter a couple of more times to complete the interface configuration and then the wizard will ask you to enter the default gateway. This is the gateway for the ext-1 network:
Setup Node 1 - SmartConnect
After the default gateway the wizard will ask to configure SmartConnect. SmartConnect is a feature to provide Load Balancing and Availability to the cluster. It is beyond the cope of what I am trying to do here so I press Enter to skip:
A good video on configuring SmartConnect is available here.
Setup Node 1 - DNS
Next up is setting up DNS. Press 1 to configure DNS servers and I enter the IP of my domain controller:

Press Enter to confirm the DNS settings, then Enter again to exit the external interface config.
Setup Node 1 - Time
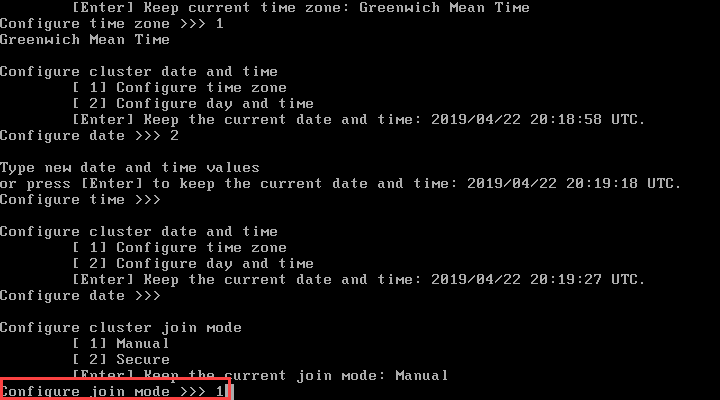
Setup of date and time is performed next. Select 1 to configure the time zone and choose the appropriate option from the list:
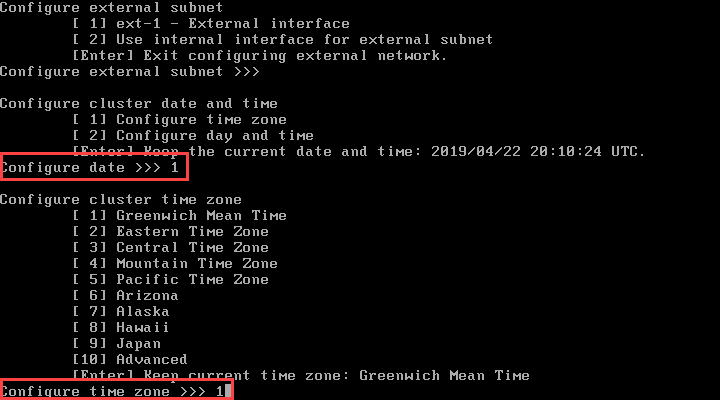
The time displayed looks good, so I will configure NTP from the GUI later.
Setup Node 1 - Cluster Join Mode
There are two options when adding a node to the cluster, Manual or Secure. Manual mode means you have to manually join the subsequent nodes manually without requiring any authorisation. Secure mode means nodes can only be added through the UI or CLI and authorisation is required. In this case I select 1 for manual mode:
Setup Node 1 - Commit Changes
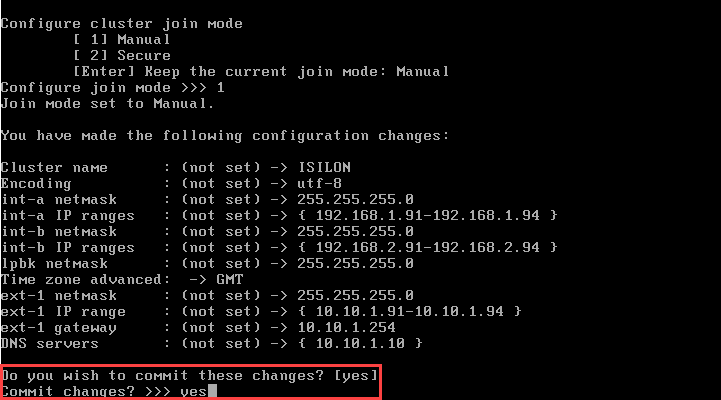
The wizard will now show the configuration about to be applied. Type yes if it all looks good:
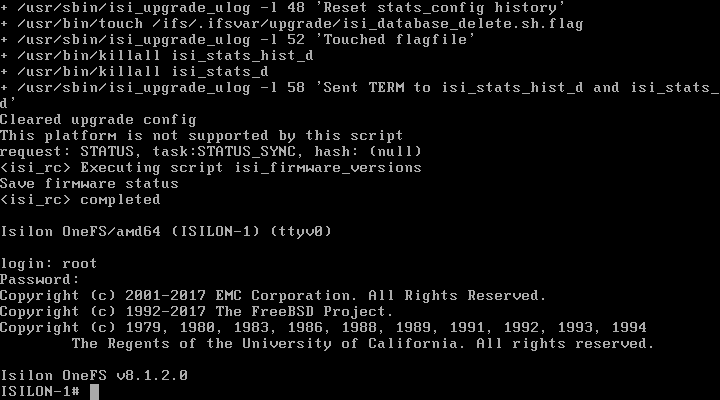
once the configuration is committed, the login prompt will be displayed. You can use the user root and the password setup earlier:
Setup Node 1 - Node Check
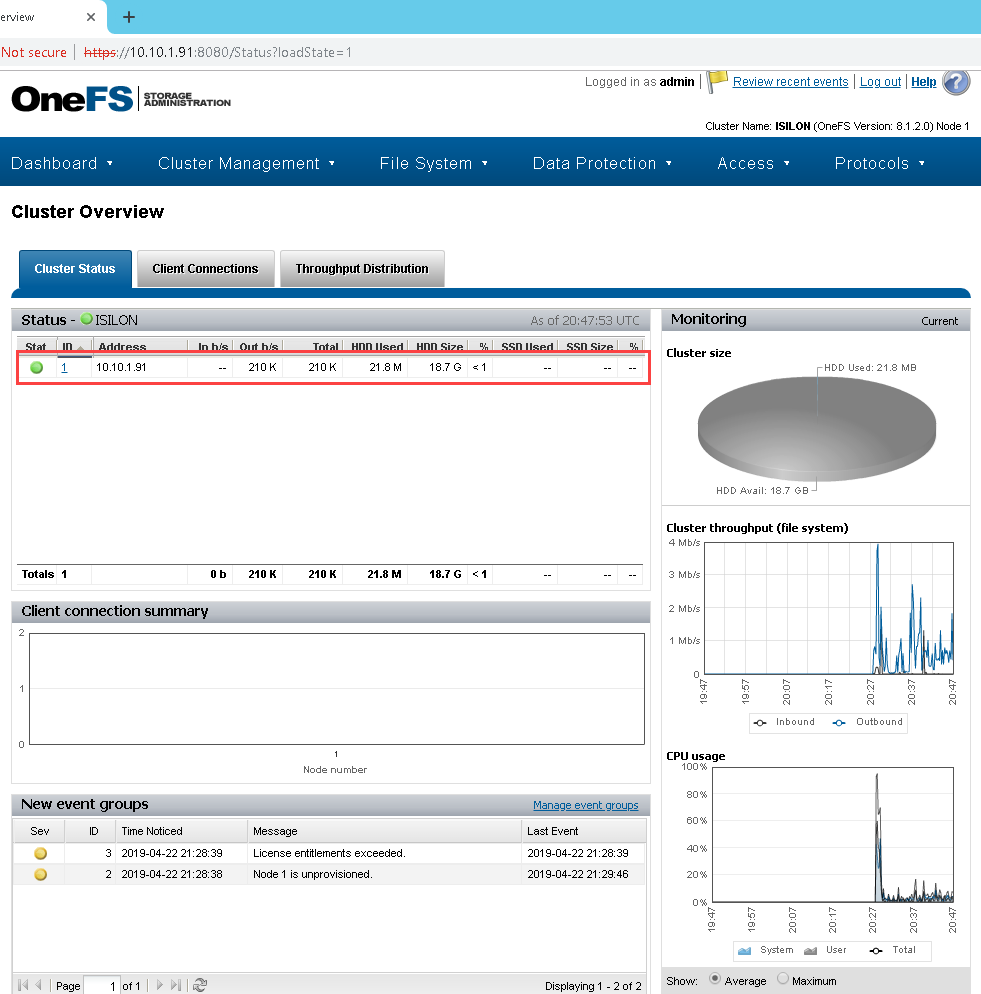
As there is only one node out of four setup yet, I will connect to the first node directly by IP. In this case the URL is https://10.10.1.91:8080. Login using the User Name admin and the password set above.
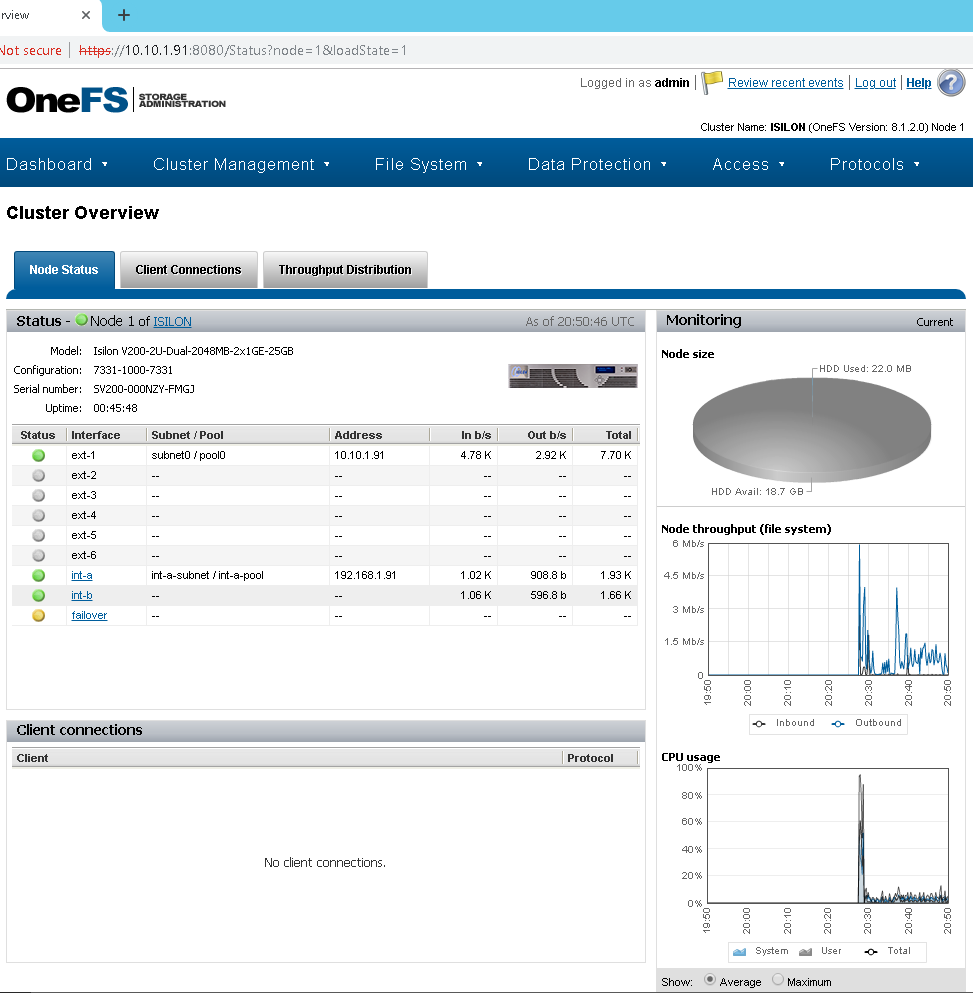
I can then click on 1 and look at Node 1 to check everything looks good. I can see the interfaces look good and the overall health of the node is green:
Wrap Up
So that is the first node in the cluster setup. Part 2 will cover adding nodes 2, 3, and 4 plus basic tasks like setting up NTP, AD integration, and licensing the cluster.