
Migrate VMware Workstation LAN Segments
Introduction
I recently built a new computer and as part of that I migrated my VMware Workstation VMs across computers. As I blogged about in the post VMware Workstation LAN Segments I use LAN Segments in my lab for most of my VMs.
Unfortunately migrating the VM’s and preserving the LAN segments wasn’t easy and I ended up having to manually fix every VM. This post will detail how to successfully migrate LAN Segments to a new computer.
This post was written using VMware Workstation v16.2.3 running on Windows 10. I created two CentOS VM’s connected to a LAN Segment called Testing to simulate my migration experience.
Initial VM Migration
First of all I copied one of the VMs across to the new PC and had a look at it’s network configuration:
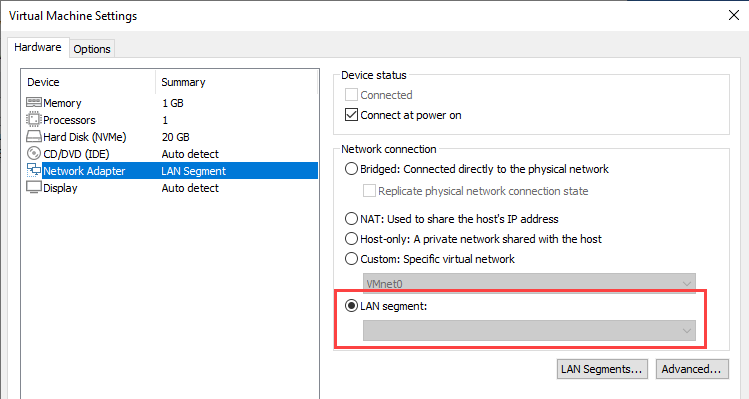
Then clicking LAN Segments...:
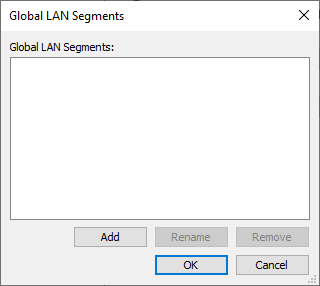
This confirms LAN Segments are part of the install - not baked into the OS. So where are LAN Segments defined?
preferences.ini
LAN Segments are stored in a file called preferences.ini. This file is located in %appdata%\VMware. On my new computer with a fresh install this file does not exist when you install or start Workstation for the first time. It is only created once a change is made to Workstation Preferences or the application is closed.
Looking at the preferences.ini on my old computer LAN Segments are defined with a name and a unique ID:
pref.namedPVNs0.name = "Testing"
pref.namedPVNs0.pvnID = "52 8c 98 ed 46 f0 ae 00-28 76 d2 99 3a 4d 1c 60"
Looking at the .vmx file for a VM attached to that LAN Segment you can see for the NIC adapter a line:
ethernet0.connectionType = "pvn"
ethernet0.addressType = "generated"
ethernet0.pvnID = "52 8c 98 ed 46 f0 ae 00-28 76 d2 99 3a 4d 1c 60"
So pvn (I’m guessing Private Virtual Network) is the name for a LAN Segment, and you can see the pvnID from the preferences.ini file.
There are a few scenarios you might want to consider when migrating to a new computer.
Straight Copy/Migration
In this case if you want to migrate your VMs and configuration it’s very straightforward. Setup the same VM folder location and copy the VMs to the same paths as the old computer. Copy the preferences.ini from %appdata%\VMware to the same folder on the new computer and the LAN segments will migrate over and the VMs will pick them up.
Partial Migration of preferences.ini
As I said in the post above I messed up migrating the when migrating to the new computer. I had a lot of old VMs and LAN Segments that were no longer required so I wanted to start fresh. I copied over CentOS-01 and created the LAN Segment that the VM used and thought I was good:

As I had the correctly named LAN Segment I opened the properties of CentOS-02 to check:
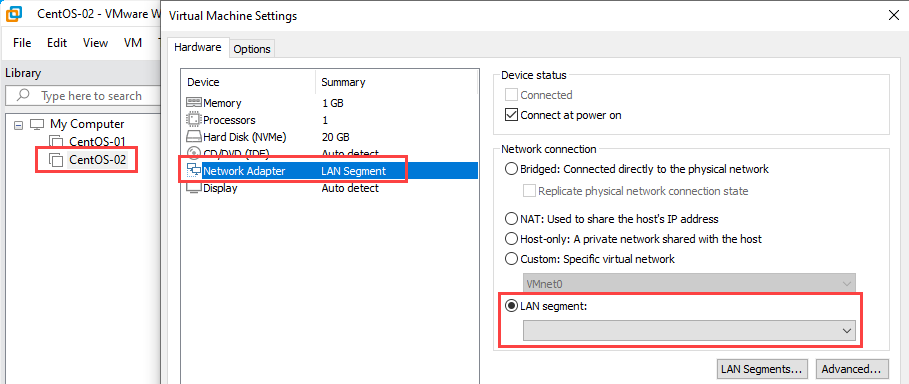
No LAN Segment showing in the VM properties. Remember the LAN Segment has a name and an ID. So looking at the VMs .vmx file it’s expecting an ID of:
ethernet0.pvnID = "52 8c 98 ed 46 f0 ae 00-28 76 d2 99 3a 4d 1c 60"
but looking at the preferences.ini:
pref.namedPVNs0.pvnID = "52 65 f4 6a d1 c5 92 0e-2b c6 cf 54 96 dc 2c 73"
Change the value in preferences.ini to match the value from the .vmx. Then looking at CentOS-02 we can now see:
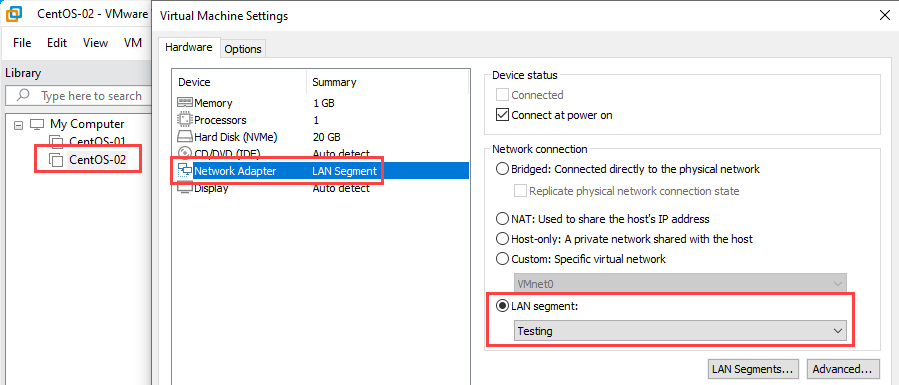
You can see the VM is now picking up the correct LAN Segment. This is fine when you have lots of VMs using the LAN Segment, but in this example I only had two VMs. Now as I changed the LAN Segment ID the VM CentOS-01 has lost the LAN segment. You need to change the VM properties to the ‘correct’ LAN Segment with the manually changed ID.
Wrap Up
LAN Segments are a great function in VMware Workstation but as they are specific to the install, migrating VMs can be a bit of a pain. Just pick a migration strategy when moving to a new computer and you should be good. It would be nice if there was a utility to export them but it’s not too much of a bother manually moving the settings.