
Blog Migration Part 1 - Setup
Introduction
I was using Blogger as my platform for hosting this blog. It was ok but things like adding code was a pain to format and get right. I never liked the templates that were available and the editor was pretty basic. I had heard about using GitHub for hosting your website and as I am keen to learn more about GitHub, it seemed like a good idea to see if I could migrate the blog to GitHub Pages. Turns out doing this I learnt a great deal of new things such as GitHub, Markdown, Jekyll, Visual Studio Code and a little Linux.
This will be a three part series:
- Part 1 - Setup
- Part 2 - Customisation
- Part 3 - Workflow
In this post I will show how I setup my environment, downloaded a Jekyll theme and then how to serve the site on GitHub Pages.
You can view this sites raw Jekyll files on GitHub at cwestwater/cwestwater.github.io
Bash on Windows 10
I am a Windows guy. There I said it. When I started looking at hosting on GitHub I thought I would need to dive into Linux for using Jekyll with GitHub. I worked for a while trying to get this going, but as a Linux novice it was hard. Then on twitter I happened to notice a post from Brian Bunke that answered my problems. He outlined how to setup Jekyll on Windows 10 using the Bash on Ubuntu shell. The post is Jekyll on Win10. I will outline the steps from that post here but full credit to Brian.
One-Time Setup
Enable the Windows 10 Developer Mode using PowerShell:
$DevModeKey = 'HKLM:\Software\Microsoft\Windows\CurrentVersion\AppModelUnlock\'
Set-ItemProperty -Path $DevModeKey -Name 'AllowDevelopmentWithoutDevLicense' -Value 1 -Type DWord
Set-ItemProperty -Path $DevModeKey -Name 'AllowAllTrustedApps' -Value 1 -Type DWord
Open the Control Panel and in the Windows Features turn on “Windows Subsystem for Linux Beta”, then reboot.
Once rebooted launch Bash from Start by selecting Bash on Ubuntu for Windows. Say y to the prompts. Now we can install update Bash, install Ruby, Bundler and Jekyll.
# Update all packages
sudo apt-get update && sudo apt-get upgrade
# Install git and essentials
sudo apt-get install build-essential git-core curl
# Prerequisites:
sudo apt-get install libgdbm-dev libncurses5-dev automake libtool bison libffi-dev

# GPG key
gpg --keyserver hkp://keys.gnupg.net --recv-keys 409B6B1796C275462A1703113804BB82D39DC0E3

# Grab RVM via curl
curl -sSL https://get.rvm.io | bash -s stable
# Load RVM on login with .bashrc
echo " " >> ~/.bashrc
echo "# This loads RVM into a shell session." >> ~/.bashrc
echo ". ~/.rvm/scripts/rvm" >> ~/.bashrc
# Re-source .bashrc
source ~/.bashrc

# Install Ruby via RVM
rvm install 2.3.1
# Tell RVM to use 2.3.1 by default. Use ruby -v to verify.
rvm use 2.3.1 --default
ruby -v

# After that is done you can install Bundler
gem install bundler

# And finally: Install Jekyll!
gem install jekyll
That’s it, you are ready to use Jekyll to build your site.
GitHub
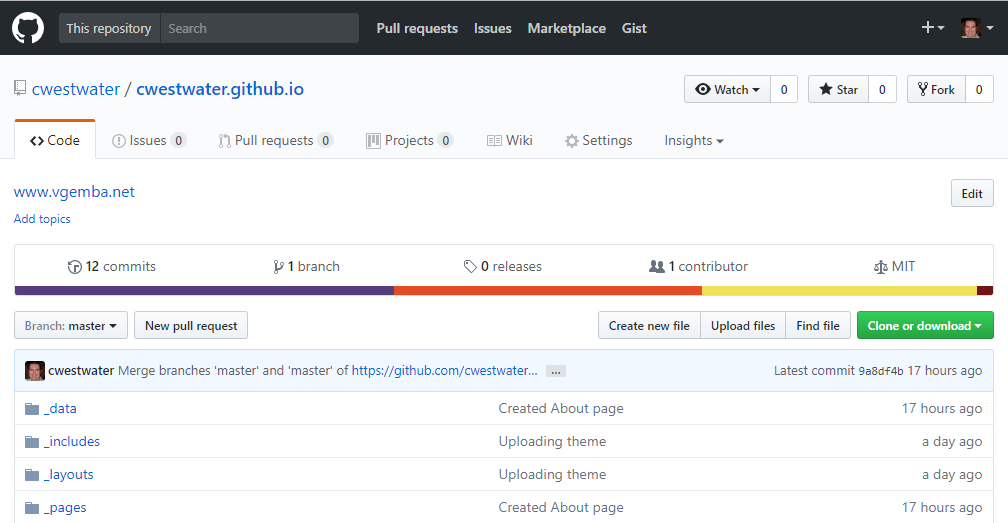
Obviously you will need a GitHub account to host the website. Once the account is live you can use a feature called GitHub Pages that will host the website for you. The key is when creating the repository, use the repo name username/username.github.io. For instance here is my repo:
That’s it - once some web content is in there, you can browse to https://username.github.io and the site will be live.
Now the repository is live, you should install the GitHub Windows client. Using the client clone the repository to your computer:
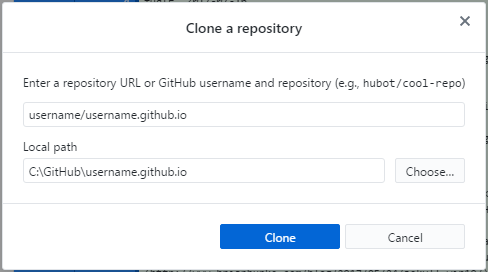
This will copy the repository to your computer which we can use with Jekyll.
Minimal Mistakes Theme
I did some searching and there are hundreds of themes available you can use to create the structure and look of your site. Think of it as the template for your site, which you then customise and then put content into. I like a simple and clean look, so I chose Minimal Mistakes. It helps there is great documentation on the site on how to use it.
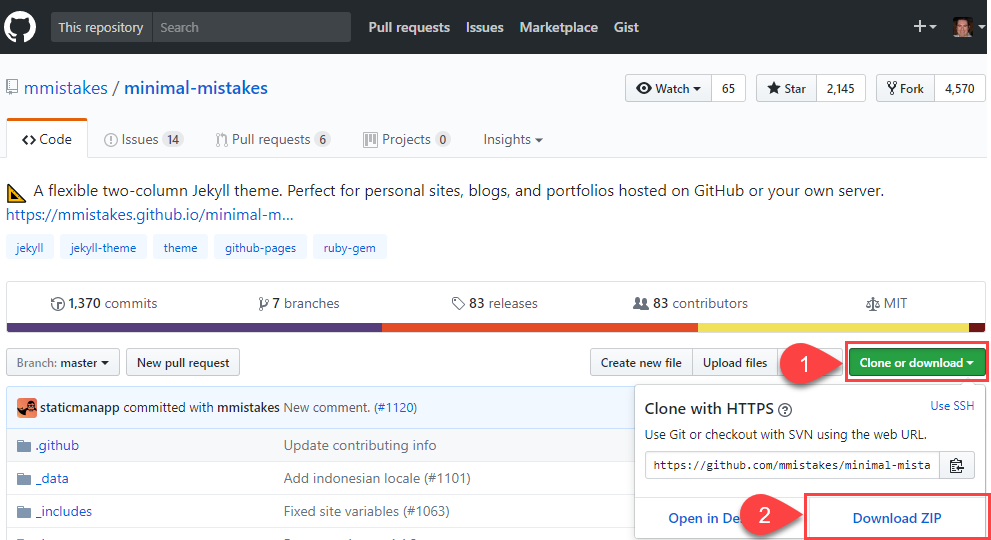
Go to the GitHub repo for Minimal Mistakes and click the green Clone or download button. Choose the Download Zip option:
Unzip this into your local repo folder (for example C:\Github\username.github.io).
Using Jekyll to serve the site
Now that the Minimal Mistakes theme is in the local repo folder, we can use Jekyll to serve up the site locally. You will want to check for and apply updates each time you start Bash, so follow these steps to update then start Jekyll:
# You'll probably be told "X packages can be updated." upon launch. Update all packages
sudo apt-get update && sudo apt-get upgrade
# (will prompt for the password you created during initial setup)

# Go to the directory you cloned your blog repo to. Tab completion works, but case-sensitivity matters
cd /mnt/c/Github/username.github.io/

# Run jekyll, building and watching the current directory:
jekyll serve --watch --force_polling
Jekyll wll run, generate the site and start serving it locally on http://127.0.0.1:4000:
username@WINDOWS10:/mnt/c/GitHub/username.github.io$ jekyll serve --watch --force_polling
Configuration file: /mnt/c/GitHub/username.github.io/_config.yml
            Source: /mnt/c/GitHub/username.github.io
       Destination: /mnt/c/GitHub/username.github.io/_site
 Incremental build: disabled. Enable with --incremental
      Generating...
                    done in 4.445 seconds.
                    Auto-regeneration may not work on some Windows versions.
                    Please see: https://github.com/Microsoft/BashOnWindows/issues/216
                    If it does not work, please upgrade Bash on Windows or run Jekyll with --no-watch.
 Auto-regeneration: enabled for '/mnt/c/GitHub/cwestwater.github.io'
    Server address: http://127.0.0.1:4000
  Server running... press ctrl-c to stop.
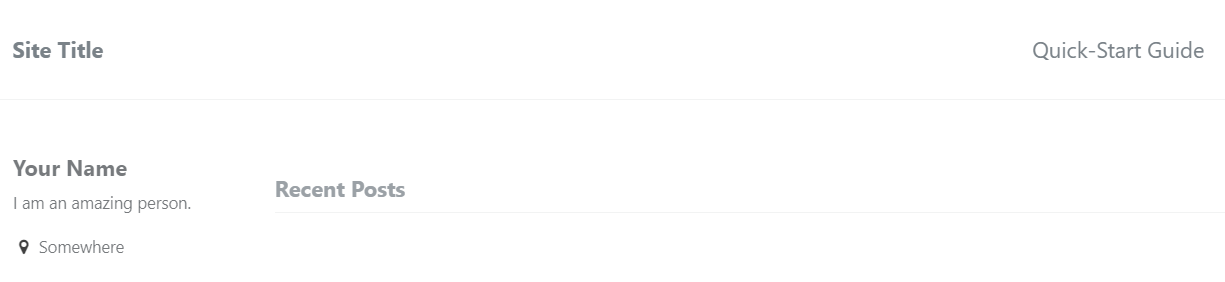
Start a web browser, go to that link and the stock Minimal Mistakes site will be shown:
Pushing the site to GitHub
Now we have confirmed we have a working website in Jekyll we want to push this to GitHub to let them serve it to the internet. Open the GitHub Desktop client. You will see there have been some changed files. This is the unzipped Minimal Mistakes theme that is now in our local repository which we are going to push to GitHub. Enter in a quick summary of what the change is and then a description. Click Commit to master:
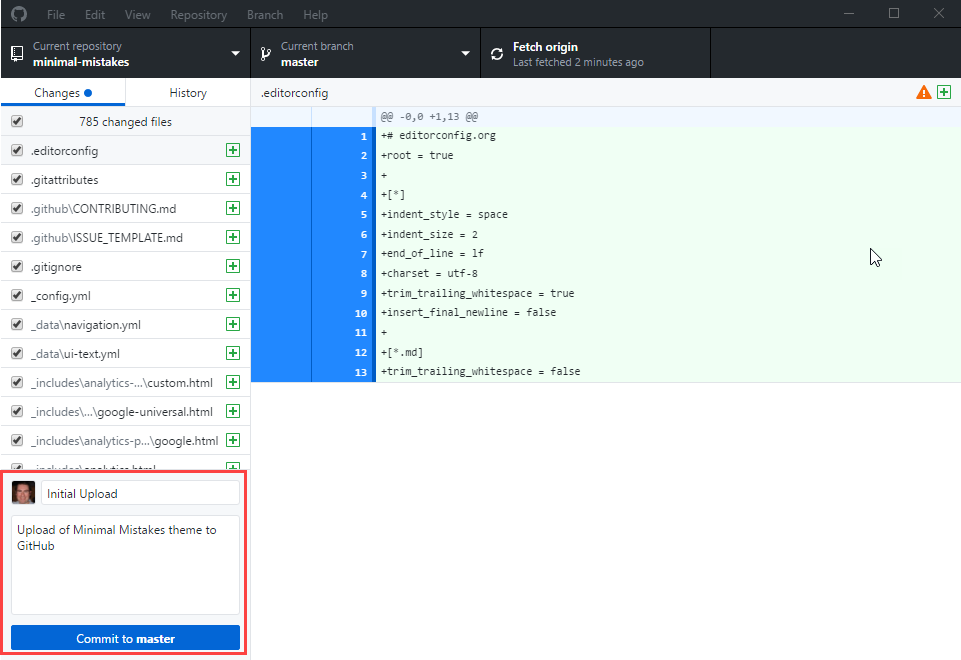
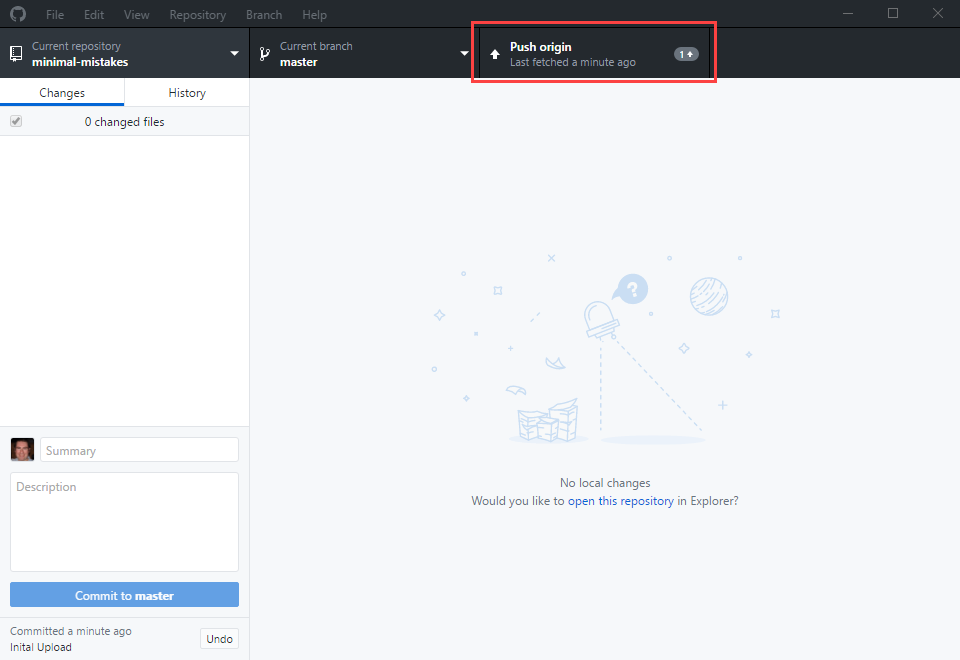
This commits the new theme files to the master branch. We now need to push this to GitHub. Click on Push origin which uploads the files to the GitHub repository:
You can then browse to the online repository in GitHub and see the same files you have on your computer are now in GitHub Pages:

Finally, to check it’s working, browse to https://username.github.io. The site should be live within a few minutes.
Part 2 - Customisation
Part 2 - Customisation deals with customising the Minimal Mistakes Jekyll theme and adding content.