
Adding VMware Drivers to Server 2012 R2 Boot Media
I build my VM’s with the VMware VMXNET3 NIC and the PVSCSI paravirtual SCSI driver to get the best performance possible from them. Unfortunately the standard 2012 R2 ISO image does not have these drivers installed.
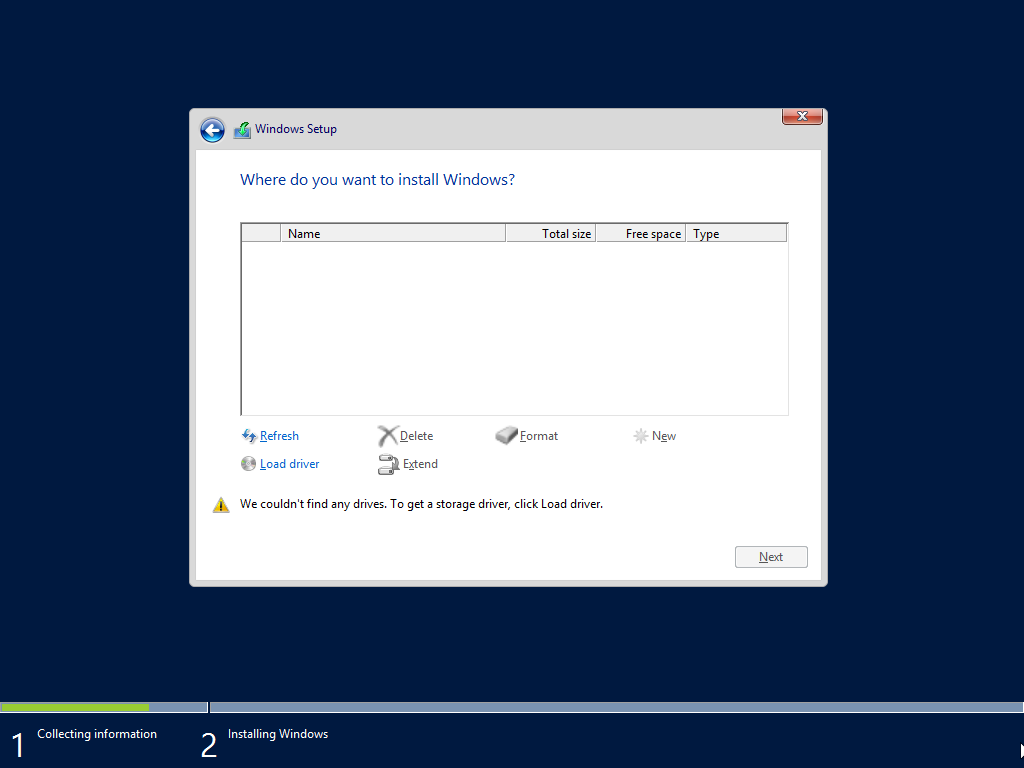
The vmxnet3 driver is installed when VMware Tools is installed in the Guest OS but this means you are without network connectivity until it’s installed. More problematic is the PVSCSI driver. During the OS install you are not able to see the disk as there is no driver for the SCSI adapter:
You can add a floppy drive and then point towards the driver but I like to keep my VM’s clean and remove all legacy hardware such as the floppy drive. Also you do this once instead of having to do the floppy drive method every time you build a VM. Let’s see how to inject the drivers so you can have full capability from the start.
Requirements
Lets get some requirements out the way. First of all you will need a copy of the drivers. It’s recommended to always use the latest versions that are part of VMware Tools. You can get them from https://vmware.com/go/tools (VMware login account required). From there download VMware Tools for Windows, 64-bit in-guest installer. We can now extract the tools to get the drivers.
Open a command prompt and browse to the downloaded exe file. Run the command:
C:\Temp>VMware-tools.exe /A
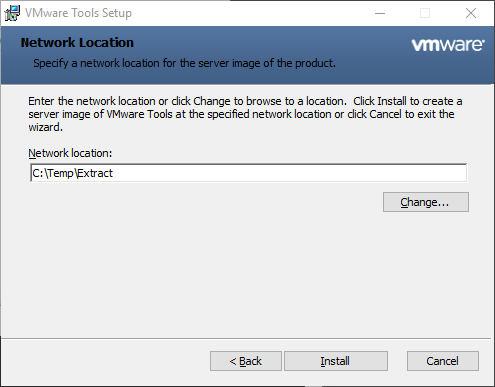
The /A performs and administrative install which basically extracts everything to a folder of your choice. Run through the wizard and at the Network Location screen choose the folder you want to extract VMware Tools to:
If you now browse to the folder you extracted into go to C:\Temp\Extract\VMware...VMware Tools...VMware...Drivers and you will see the folders pvscsi and vmxnet3 which have the drivers we want. Under each of the folders there are two folder options, Vista and Win8. For a 2012 R2 server you want Win8 so delete the Vista folder from both vmxnet3 and pvscsi. It will be easier if you move the folders to a shorter path such as C:\Temp\Drivers.
Next we need a Windows Server 2012 R2 iso file. Using something like 7-Zip and browse into the iso. Copy \sources\boot.wim and \sources\install.wim into C:\Temp.
Finally create a folder to mount the wim files into such as C:\Temp\Mount
boot.wim
Let’s first update boot.wim. Open a command prompt as an administrator and browse to C:\Temp. Using DISM mount the wim file, add the drivers and then unmount the WIM making sure to commit the changes:
dism /Mount-Wim /WimFile:C:\Temp\boot.wim /Index:2 /MountDir:C:\Temp\Mount
dism /Image:C:\Temp\Mount /Add-Driver /Driver:C:\Temp\Drivers /Recurse
dism /Unmount-Wim /MountDir:C:\Temp\Mount /Commit
Here is a run through of the commands:
C:\Temp>dism /Mount-Wim /WimFile:C:\Temp\boot.wim /Index:2 /MountDir:C:\Temp\Mount

Deployment Image Servicing and Management tool
Version: 10.0.16299.15

Mounting image
[==========================100.0%==========================]
The operation completed successfully.

C:\Temp>dism /Image:C:\Temp\Mount /Add-Driver /Driver:C:\Temp\Drivers /Recurse

Deployment Image Servicing and Management tool
Version: 10.0.16299.15

Image Version: 6.3.9600.16384

Searching for driver packages to install...
Found 4 driver package(s) to install.
Installing 1 of 4 - C:\Temp\Drivers\pvscsi\Vista\pvscsi.inf: The driver package was successfully installed.
Installing 2 of 4 - C:\Temp\Drivers\pvscsi\Win8\pvscsi.inf: The driver package was successfully installed.
Installing 3 of 4 - C:\Temp\Drivers\vmxnet3\Vista\vmxnet3.inf: The driver package was successfully installed.
Installing 4 of 4 - C:\Temp\Drivers\vmxnet3\Win8\vmxnet3.inf: The driver package was successfully installed.
The operation completed successfully.

C:\Temp>dism /Unmount-Wim /MountDir:C:\Temp\Mount /Commit

Deployment Image Servicing and Management tool
Version: 10.0.16299.15

Image File : C:\Temp\boot.wim
Image Index : 2
Saving image
[==========================100.0%==========================]
Unmounting image
[==========================100.0%==========================]
The operation completed successfully.

C:\Temp>
install.wim
install.wim is the wim file that the actual Server 2012 R2 install files are located. The wim file can have many versions of the OS available such as Standard, Datacenter, Gui, Core, etc. You can check how many versions are in the wim file by running:
C:\Temp>dism /get-wiminfo /wimfile:C:\Temp\install.wim

Deployment Image Servicing and Management tool
Version: 10.0.16299.15

Details for image : C:\Temp\install.wim

Index : 1
Name : Windows Server 2012 R2 Standard (Server Core Installation)
Description : This option (recommended) reduces management and servicing by installing only what is needed to run most server roles and applications. It does not include a GUI, but you can fully manage the server locally or remotely with Windows PowerShell or other tools. You can switch to a different installation option later. See "Windows Server Installation Options."
Size : 6,836,711,203 bytes

Index : 2
Name : Windows Server 2012 R2 Standard (Server with a GUI)
Description : This option is useful when a GUI is required—for example, to provide backward compatibility for an application that cannot be run on a Server Core installation. All server roles and features are supported. You can switch to a different installation option later. See "Windows Server Installation Options."
Size : 11,676,579,164 bytes

Index : 3
Name : Windows Server 2012 R2 Datacenter (Server Core Installation)
Description : This option (recommended) reduces management and servicing by installing only what is needed to run most server roles and applications. It does not include a GUI, but you can fully manage the server locally or remotely with Windows PowerShell or other tools. You can switch to a different installation option later. See "Windows Server Installation Options."
Size : 6,837,191,915 bytes

Index : 4
Name : Windows Server 2012 R2 Datacenter (Server with a GUI)
Description : This option is useful when a GUI is required—for example, to provide backward compatibility for an application that cannot be run on a Server Core installation. All server roles and features are supported. You can switch to a different installation option later. See "Windows Server Installation Options."
Size : 11,676,661,826 bytes

The operation completed successfully.
You can see this has four versions available in the same install.wim. We will need to add the drivers to each index. Same procedure as before - mount the wim, add the drivers, unmount and commit the changes:
dism /Mount-Wim /WimFile:C:\Temp\install.wim /Index:1 /MountDir:C:\Temp\Mount
dism /Image:C:\Temp\Mount /Add-Driver /Driver:C:\Temp\Drivers /Recurse
dism /Unmount-Wim /MountDir:C:\Temp\Mount /Commit

dism /Mount-Wim /WimFile:C:\Temp\install.wim /Index:2 /MountDir:C:\Temp\Mount
dism /Image:C:\Temp\Mount /Add-Driver /Driver:C:\Temp\Drivers /Recurse
dism /Unmount-Wim /MountDir:C:\Temp\Mount /Commit

dism /Mount-Wim /WimFile:C:\Temp\install.wim /Index:3 /MountDir:C:\Temp\Mount
dism /Image:C:\Temp\Mount /Add-Driver /Driver:C:\Temp\Drivers /Recurse
dism /Unmount-Wim /MountDir:C:\Temp\Mount /Commit

dism /Mount-Wim /WimFile:C:\Temp\install.wim /Index:4 /MountDir:C:\Temp\Mount
dism /Image:C:\Temp\Mount /Add-Driver /Driver:C:\Temp\Drivers /Recurse
dism /Unmount-Wim /MountDir:C:\Temp\Mount /Commit
Create the ISO
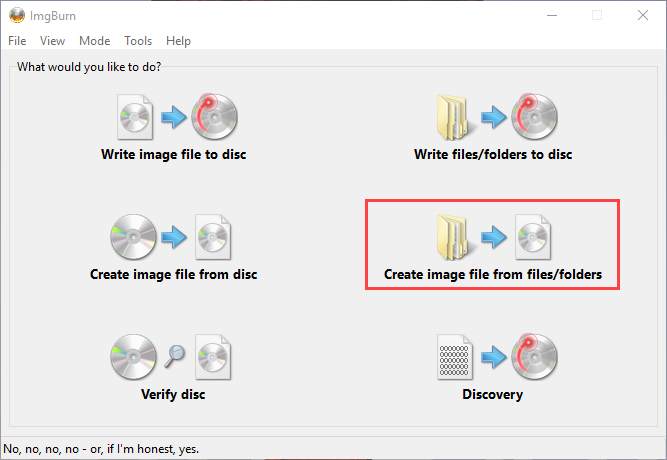
Now that boot.wim and install.wim have been updated, copy those files back into the \sources folder. We now need to create the bootable ISO from the extracted ISO files. There are applications that can do this for you, but I will demonstrate using ImgBurn.
Open ImgBurn and select Create image file from files/folders:
In ImgBurn:
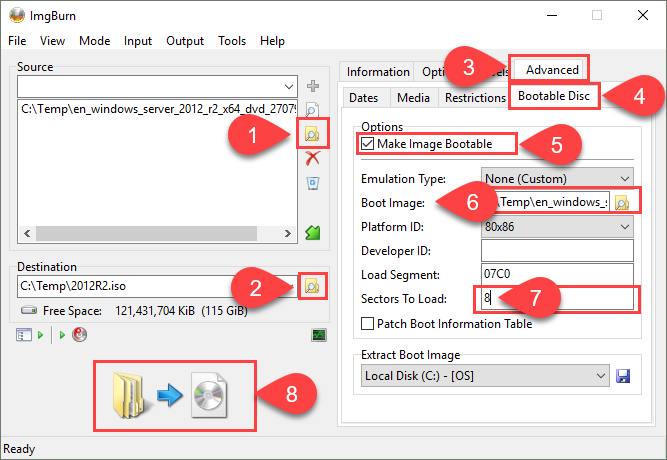
- Under source browse to the extracted Iso folder
- Under destination choose a folder and ISO file name
- Select Advanced tab
- Select Bootable Disc
- check Make Image Bootabel
- Under Boot image select
\boot\etfsboot.com - Under Sectors to Load enter 8
- Click burn Image
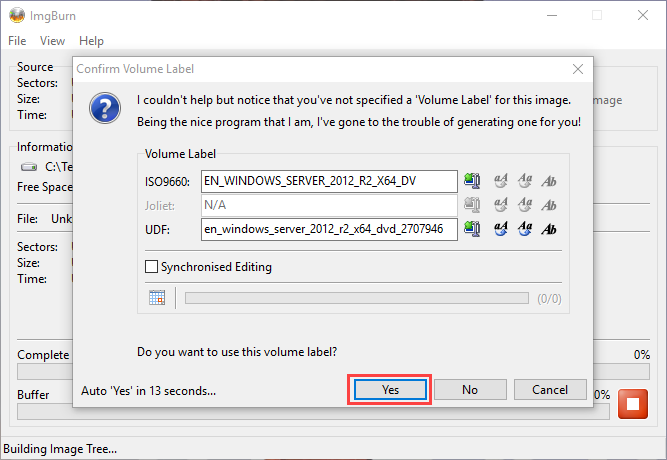
In the Confirm Volume Label dialog box click Yes:
Lastly click OK in the confirmation dialog box:
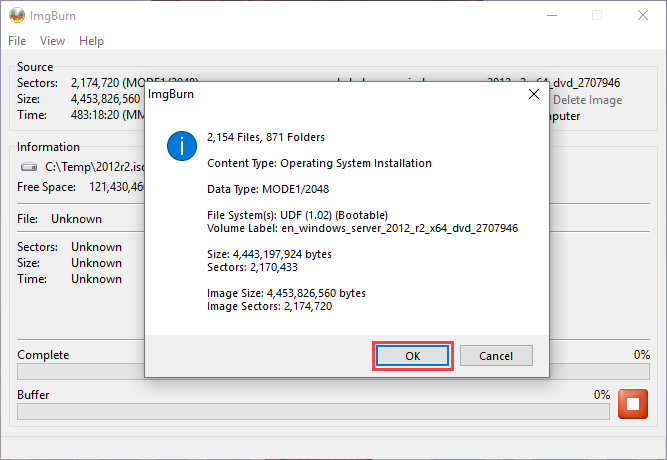
The ISO is generated. You can now use that to build your Windows Server 2012 R2 VM with the paravirtual drivers in place.