
VMware Workstation Tech Preview 2018 REST API
Introduction
VMware recently announced the release of VMware Workstation Tech Preview 2018. This has a number of new features:
- DirectX 10.1 support
- REST API
- Support for Windows 10 High DPI
- Host level high DPI
- The ESXi Host / cluster view when connecting to vCenter
- USB Auto Connect functions for a virtual machine
- Support for Wayland architecture for Linux hosts
The feature I am most interested in is the REST API. After listening to Craig Dalrymple present a session at the last Scottish VMUG called Making Your 1st Restful API call to VMware I wanted to try using an API. I had not tried it in my home lab or production at work as I didn’t want to screw anything up, so using Workstation is ideal.
Starting the REST API
The REST API needs to be started from the command line. The file you need to run is located in C:\Program Files (x86)\VMware\VMware Workstation. You can then vmrest.exe --help to see some basic help:
C:\Program Files (x86)\VMware\VMware Workstation>vmrest.exe --help
VMware Workstation REST API
Copyright (C) 2018 VMware Inc.
All Rights Reserved

vmrest 1.1.0 build-8888902
Usage of vmrest.exe:
  -c, --cert-path <cert-path>
        REST API Server certificate path
  -C, --config
        Configure credential
  -d, --debug
        Enable debug logging
  -h, --help
        Print usage
  -i, --ip <ip>
        REST API Server IP binding (default 127.0.0.1)
  -k, --key-path <key-path>
        REST API Server private key path
  -p, --port <port>
        REST API Server port (default 8697)
  -v, --version
        Print version information
To start the REST API you simply type:
C:\Program Files (x86)\VMware\VMware Workstation>vmrest.exe
VMware Workstation REST API
Copyright (C) 2018 VMware Inc.
All Rights Reserved

vmrest 1.1.0 build-8888902
-
Using the VMware Workstation UI while API calls are in progress is not recommend
ed and may yield unexpected or unintended results.
-
Serving HTTP on 127.0.0.1:8697
-
Press Ctrl+C to stop.
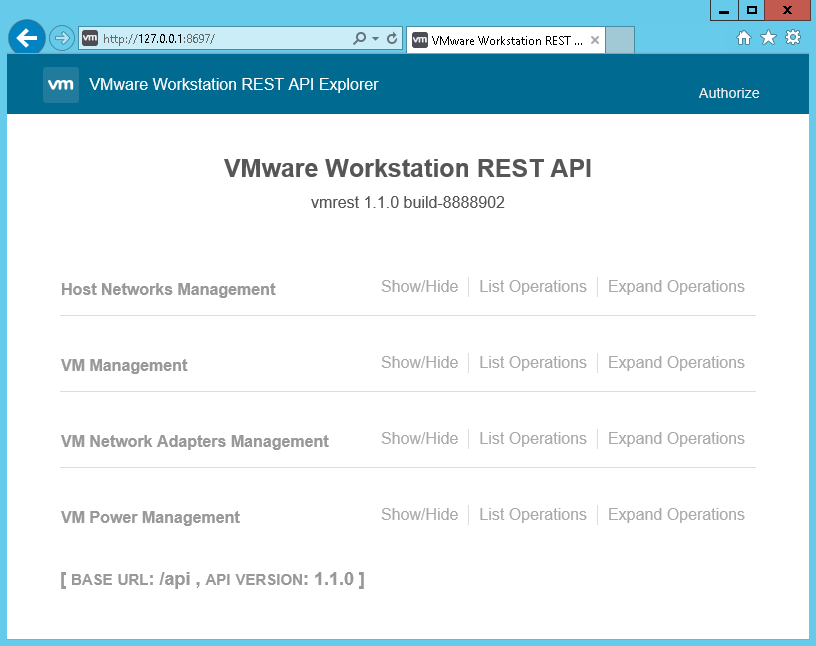
You can see that there is a web based Swagger interface for browsing the API on http:\\127.0.0.1:8697:
Authentication
If you now try to do anything through the API it will not work as we are not authenticated. We need to configure some credentials. This is done using vmrest --config but remember if the API is running you will need to stop it by pressing CTRL+C:
C:\Program Files (x86)\VMware\VMware Workstation>vmrest --config
VMware Workstation REST API
Copyright (C) 2018 VMware Inc.
All Rights Reserved

vmrest 1.1.0 build-8888902
Username:cwestwater
New password:
Retype new password:
Processing...
Credential updated successfully

C:\Program Files (x86)\VMware\VMware Workstation>
You simply enter a username and password for authentication to the API. Start the REST API again using vmrest.exe. Now in the web interface click the Authorize link in the top right, enter the username and password and then click the Authorize button:
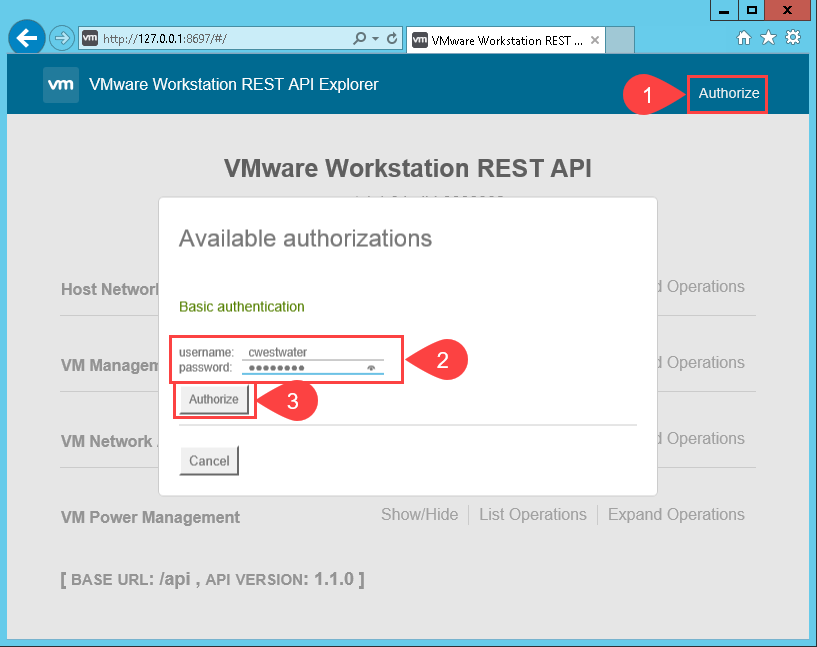
There does not seem to be any visual indication that you are logged in, the only way to check is to do something.
Swagger Interface
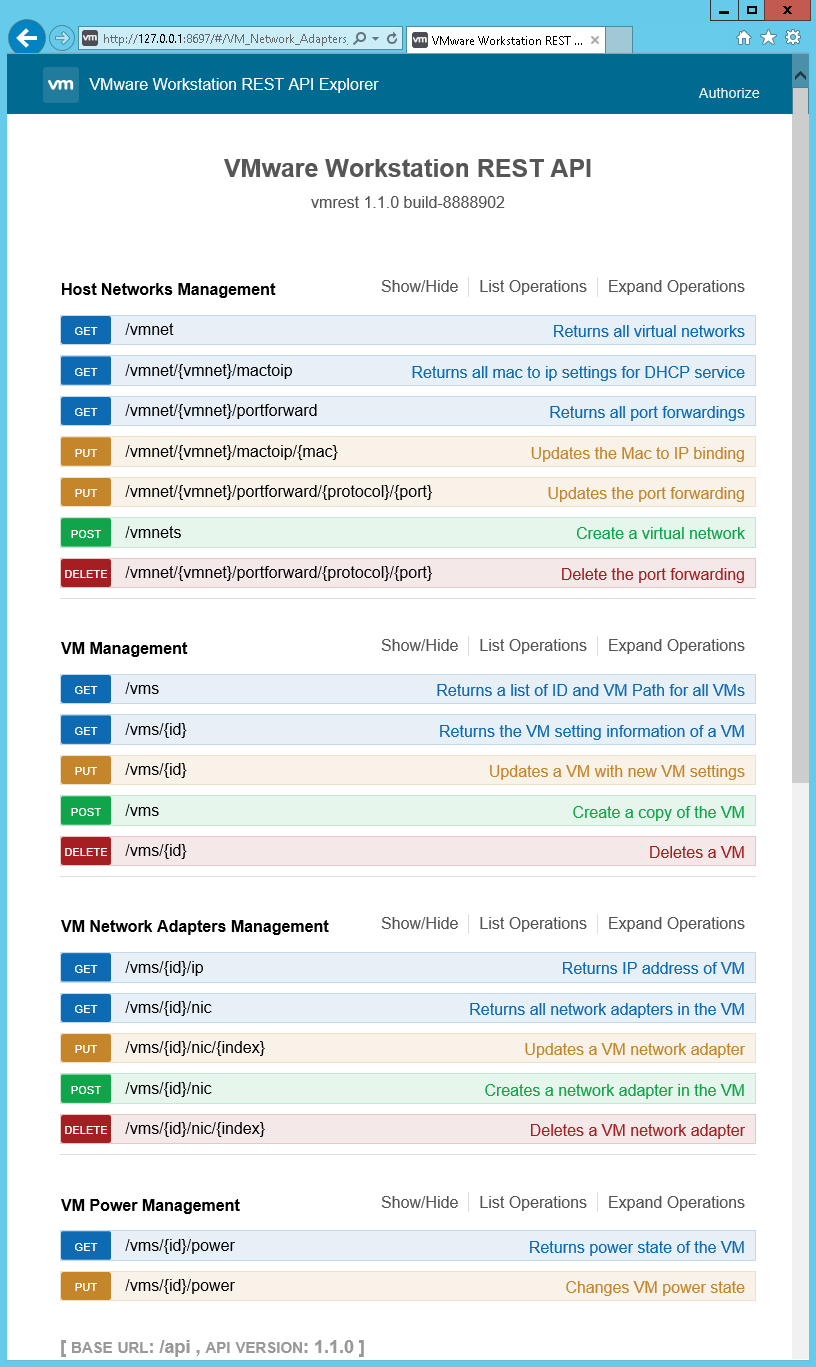
The Swagger interface is a great way to try the API. You don’t need to use things like Curl, PowerShell, Postman, etc. you can simply use the web interface to perform API operations. You can see that there are four main sections available with various operations available under them:
There are quite a few operations available in the API. Lets try out a few.
Simple GET Operation
A quick check to see if things are working right is to use the Swagger interface and try a GET operation. GET means reading something, no changes are made - safe!
Browse to VM Management...Show/Hide..GET /vms then click TRY IT OUT! The Response Body shows the two VM’s I have in Workstation:
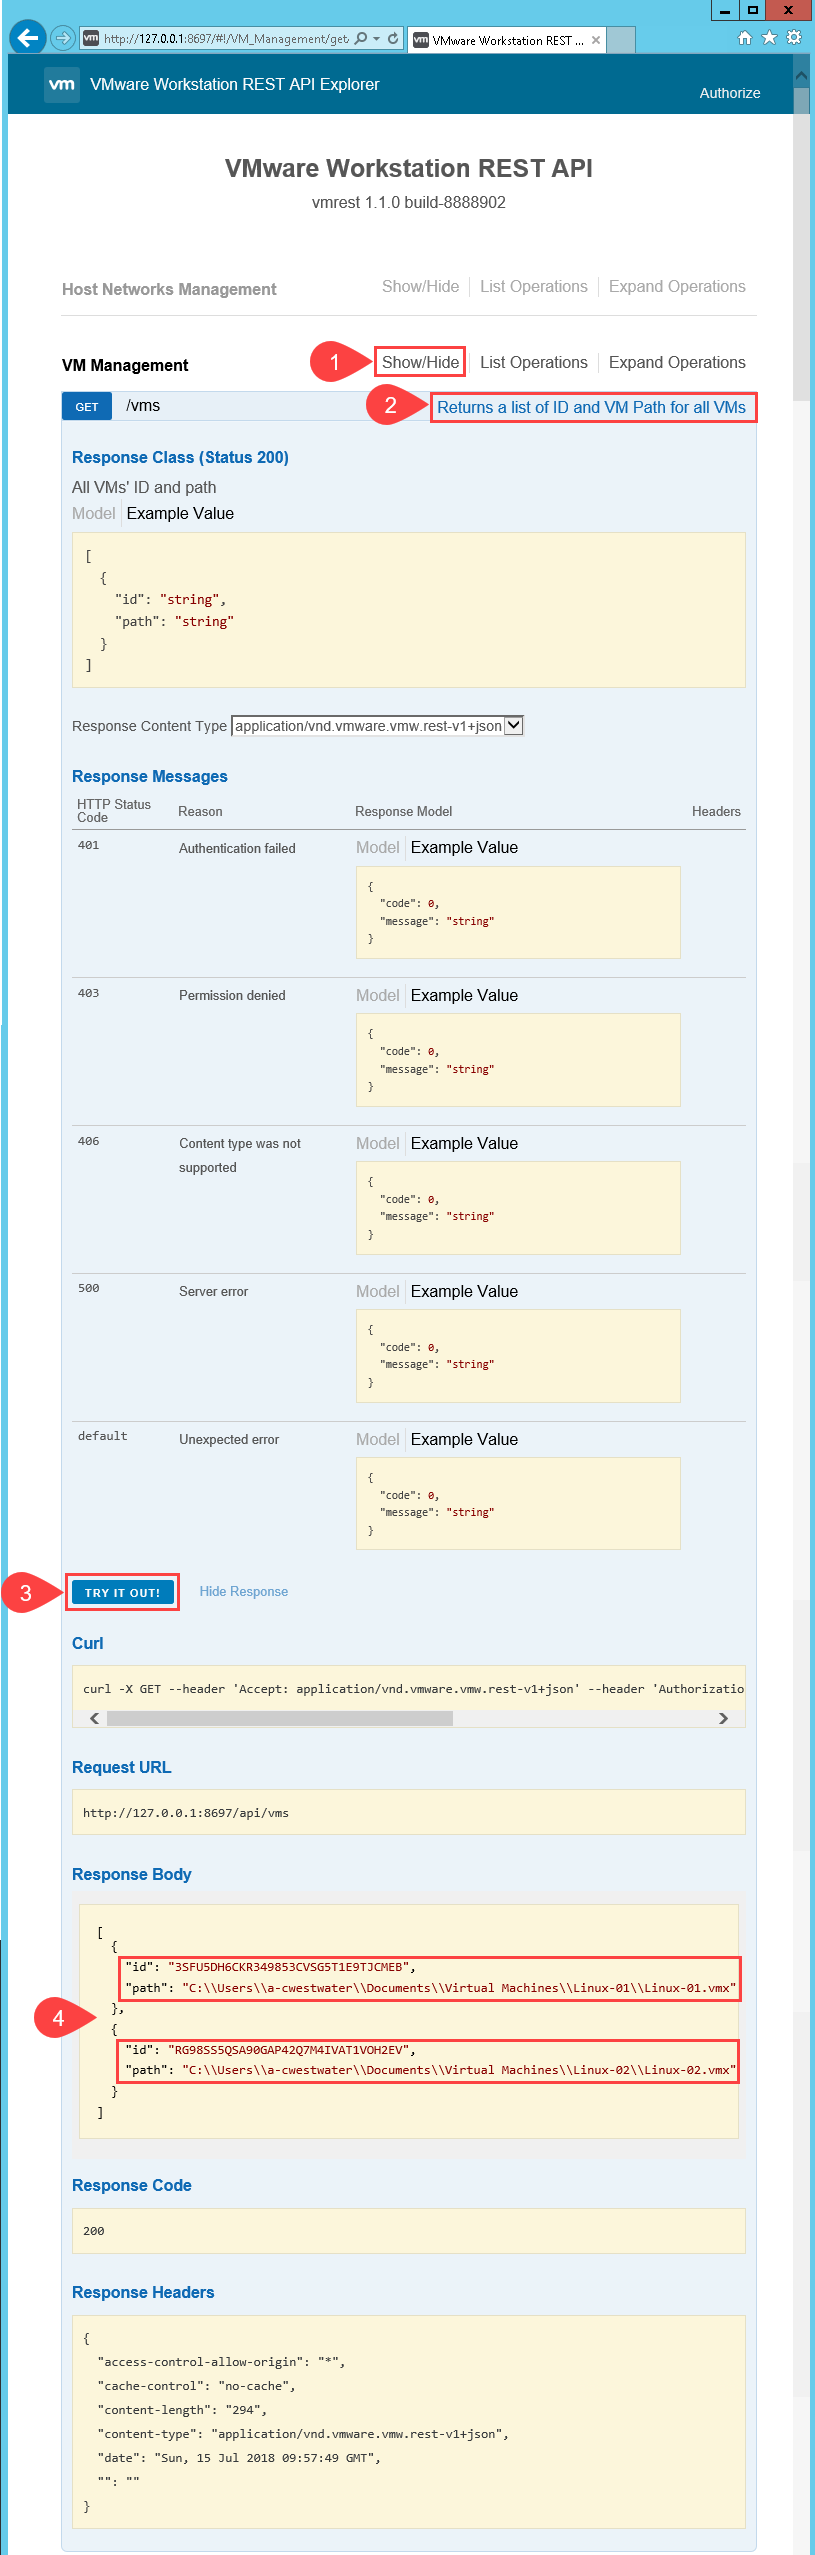
So in the above screenshot you can see from the interface some useful information. We can see what the response should look like, the HTTP response codes (200 means we were successful), the Curl command, and what we actually want to see, the Response body:
[
  {
    "id": "3SFU5DH6CKR349853CVSG5T1E9TJCMEB",
    "path": "C:\\Users\\a-cwestwater\\Documents\\Virtual Machines\\Linux-01\\Linux-01.vmx"
  },
  {
    "id": "RG98SS5QSA90GAP42Q7M4IVAT1VOH2EV",
    "path": "C:\\Users\\a-cwestwater\\Documents\\Virtual Machines\\Linux-02\\Linux-02.vmx"
  }
]
Now we have a list of the VM’s and their IDs we can try something else. Let’s get some VM setting information for a particular VM. To do this use GET /vms/{id}. In the web interface expand VM Management...Show/Hide..GET /vms/{id}. Under the parameter section we need to use one of the ids from above, in this case I will use "id": "RG98SS5QSA90GAP42Q7M4IVAT1VOH2EV".
In the parameters section it is looking for parameter of id. Copy and paste the id of the VM into the field:
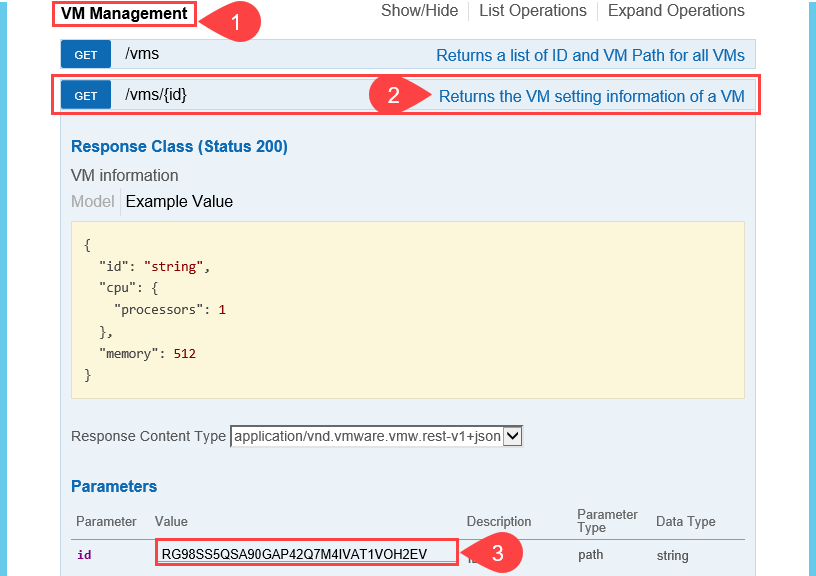
One this id is entered click TRY IT OUT!. The Response Body section gives us the details of the VM:
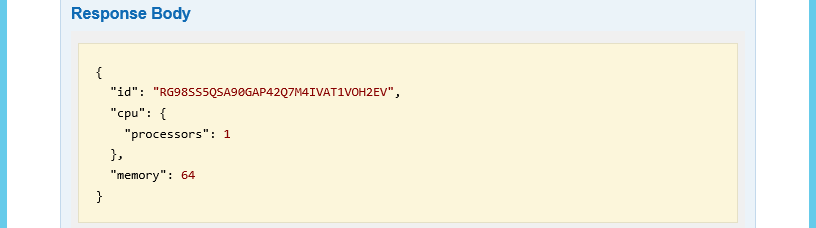
The VM has a single CPU with 64MB of RAM.
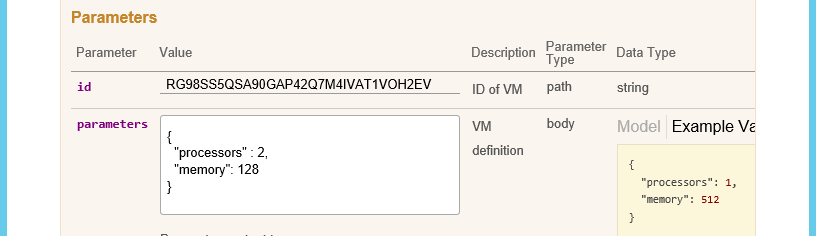
Simple PUT Operation
A PUT operation updates something. In this case we want to add a CPU and some memory to a VM. This is under VM Management...Show/Hide..PUT /vms/{id}. We again need to define some details in the Parameters section. The first is the id of the VM like we did above.
Next we need to add some definition of what the VM needs to be changed too. This is in the parameters text box. There is an example shown just to the right:
Again click the TRY IT NOW! button and we get the response:
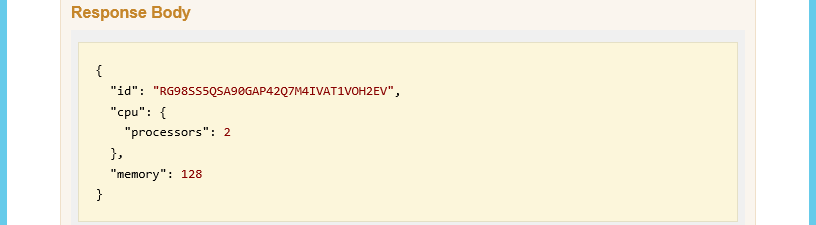
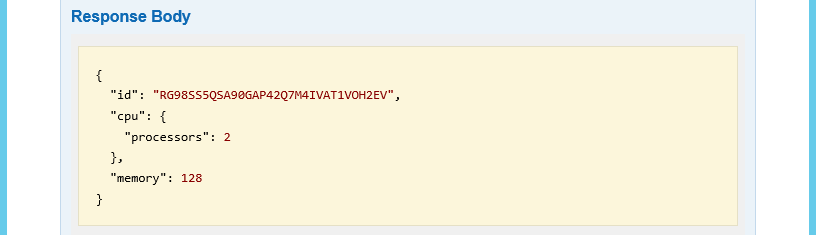
The VM now has 2 CPUs and double the amount of RAM. We can check using the API again:
DELETE Operation
Finally I want to delete the VM as I am done with it. This is found under VM Management...Show/Hide..DELETE /vms/{id}. There is a warning with DELETE operations. Unlike the GUI there is no confirmation or check you actually want to delete, it just does it. So be aware!
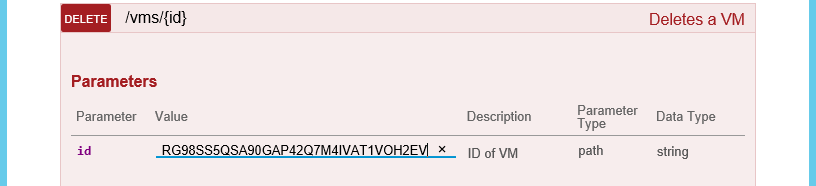
Again we need to define the id of the VM we want to delete then click TRY IT OUT!. This time we get a Response Body and Response Code of:
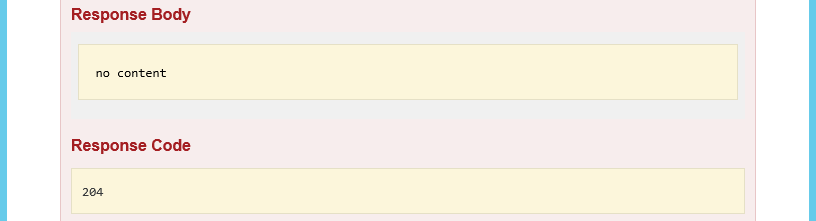
Not the usual response we have seen above. Usually we get a Response Code of 200, but this time it’s 204. That is 204? Scroll up in the web interface and you see:

So 204 is the VM was deleted. We can confirm using GET /vms:
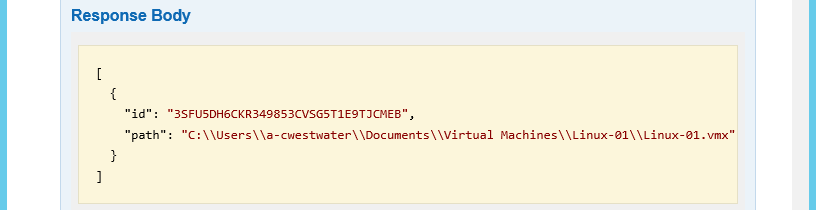
The VM with the id of RG98SS5QSA90GAP42Q7M4IVAT1VOH2EV is gone.
Wrap Up
When I started with this blog post I had never used an API before, but within an hour I was using the Swagger interface to interface with VMware Workstation. 30 minutes later I was using Postman to do the same. I think using the ‘safety’ of Workstation to get used to the VMware API is a great way of learning how to using the API.
I plan to investigate further as I use Workstation as my lab, so being able to automate operations using the API could help me a great deal. I expect further development of the API as the Tech Preview progresses.